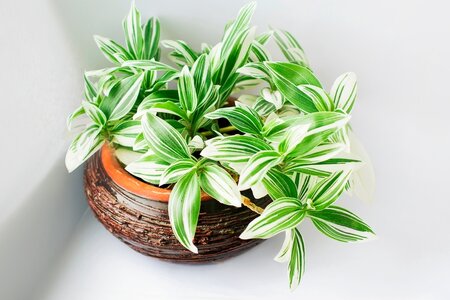
Tradescantia is a genus of plants native to the Americas, named after John Tradescant, a famous 17th-century plant-hunter. Many species grow outdoors, but three, in particular, make lovely houseplants, with long stems that trail elegantly over the edges of pots and hanging baskets. Tradescantia zebrina has green and silver variegated leaves that show a flash of purple on the undersides. Tradescantia pallida has dark purple leaves, and Tradescantia fluminensis has green and white-striped leaves.
They flower intermittently, producing small three-petalled flowers, but the colourful foliage is the main attraction.
Where to grow Tradescantia
Tradescantia is a very accommodating houseplant. They can cope with surprisingly little light, although if the levels are too low, the leaves will lose their variegation, turning green. Too much direct light will scorch the leaves, so a position with bright, indirect light and a temperature between 15-26°C (60-80°F) is ideal.
Caring for Tradescantia as houseplants
Tradescantia like moist but not soggy soil, so plant them in well-drained potting compost mixed with sand or vermiculite, in containers with good drainage holes. Water weekly in summer, and reduce watering in winter. Mist regularly.
They don’t need much feeding – a dose of half-strength liquid feed once every two months during spring and summer will do fine. Pinch off the growing tips of the stems occasionally to encourage the plants to grow bushy.
Keep an eye out for signs of aphids or spider mites and wipe them off with a damp cloth before infestations have a chance to develop. Alternatively, cut off affected stems and dispose of them in a sealed plastic bag.
Taking Tradescantia cuttings
After two or three years, Tradescantia plants will start to look tired and leggy. Fortunately, it’s very easy to grow new plants from cuttings. Here are three simple ways to take Tradescantia cuttings:
-
Cut a 2-3cm (1in) long section of stem with a leaf, and push the lower end into a pot filled with compost. Water regularly. The cutting will root within a few weeks and grow into a new plant.
-
Pinch off a section of stem and place it in a glass of water. Leave it for a couple of weeks, changing the water weekly, until it develops roots, then plant in a pot filled with compost.
-
Fill a small pot with moist compost. Select a long stem and, without detaching it from the mother plant, pin it down across the smaller pot so that one of the leaf nodes is touching the compost. In a few weeks, the stem will start to develop roots at this point. Once the roots are well developed, cut the stem off the mother plant and let it grow on in the new pot.
If you’re looking for a houseplant to add a new touch to your home this year, come and see the exciting range of plants in our centre. You’re sure to find one that’s right for you.


